To get the AStore Theme set-up correctly there are a few steps that you have to take
Below you will see a few links to different blank images that are in this theme
To create a image suitable for your selected theme, copy this link and follow the details of using an online image editor – SumoPaint
1. Logo
This themes sample site has a logo size of:
240 x 55 pixels (width x height)
Sample Image Link
http://static.wearequick.com/themeimages/logo.jpg
You can add your new logo in the admin area by going to admin > system > settings (image tab)
Click here to view more details about how to add a logo
2. Shop Details
Now your shop has been setup, you can modify your shops name, location and currency.
You can do this in the admin area by going to admin > system > settings
The fields you should edit are:
| General Tab:Store Name: Address: E-Mail: Telephone: Fax: | Store Tab:Title: Meta Tag Description: | Local Tab:Country: Region / State: Currency: Length Class: Weight Class: |
Click here to view more details about modifying the settings area
3. Home Page Slides
This themes sample site has a home page slide size of:
857 x 430 pixels (width x height)
Sample Image Link
http://static.wearequick.com/themeimages/astore-slider.png
Adding New Slides
You can add your new logo in the admin area by going to admin > system > Home Page Slides

Click here to view more details about using the Theme Content Slider
4. Shop Colors
To modify the shop colors go to
admin > system > modules > Theme Control Module
General Tab
Default Theme: Select a pre made theme you would like to use
Enable Panel Tool: This gives you more control over the shops colors
Body Pattern: Click on a pre installed background color to use it
Use Custom Background: You can also upload your own background image and then select it
Customize Background: How the image is used / displayed

Page Setting Tab
This tab has two sub tabs available
Category Tab
The Category tab lets you modify how the site displays:
Display Product Modes
Columns
Enable Product Popup Image
Contact Tab
This lets you enter indetails that are displayed on the contact page
Location Address: Start typing in your address – if available it will auto complete. Select your address when it is displayed and the Latitude/ Longitude will be automatically entered
Custom HTML: Enter in any addition details you would like displayed
Font Tab
This tab lets you modify the fonts used on the site. There are also 3 font style area that you can use to modify different areas on the site.
You can modify:
- Font Size
- Enable Customize Font: (standard or Google fonts available)
- Body Selector: Put CSS Selector such as body, h1, h3,h4, .box-title
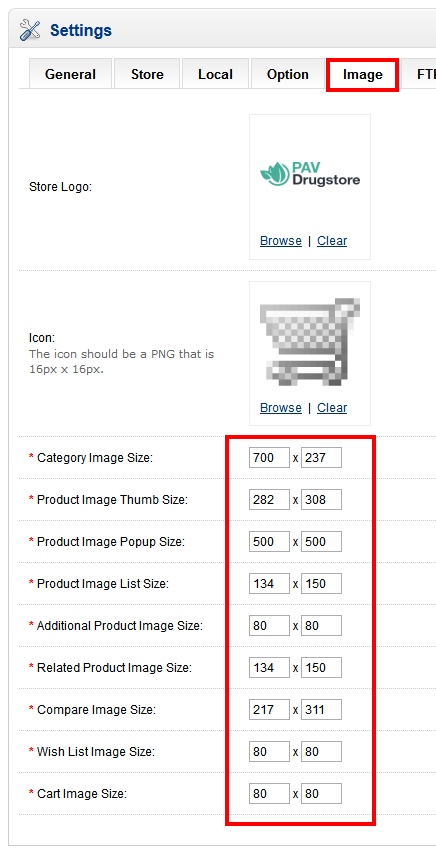
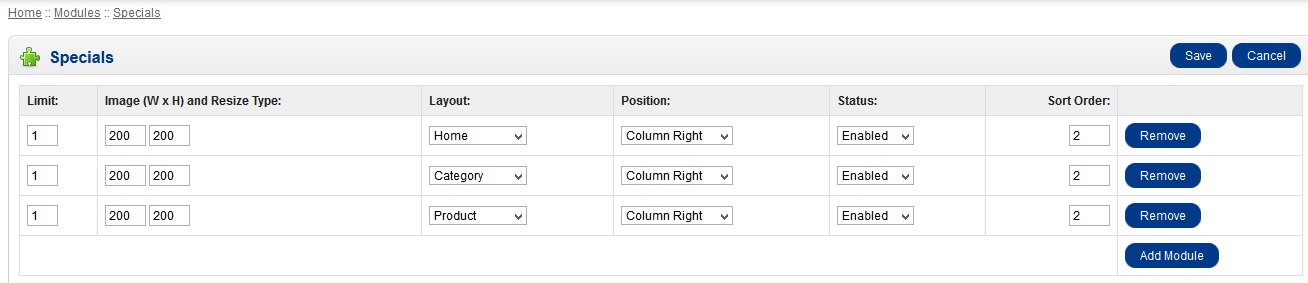
5. Shop Default Image Sizes
You can modify the size of the images displayed in your shop by going to admin > system > settings ‘image tab’
If you would like to have the default sizes displayed again, you can view what they are in the image below.
6. Adding Product Categories
To make it easier to manage products we use categories. This lets you group similar products together
You can do this in the admin area by going to admin > product > categories
Click here to view more details about adding a category
This theme uses an advance category display module called MegaMenu
Click here to view more details about this module
7. Add a Product
Now your shop has at least one category, you can now start to add your products to sell.
You can do this in the admin area by going to admin > product > Your Products
Click here to view more details about adding a product
8. Update Your Shipping Options
Your shop comes setup with a few different shipping modules pre-installed
These are available by going to admin > extensions > shipping options
Click here to view more details about the different shipping modules
9. Add Shop Information
The Internet is all about Information so now is the time to add in some content to your site.
You can do this in the admin area by going to admin > information > Information Pages
Click here to view more details about adding Information Pages
10. Other Modules of interest
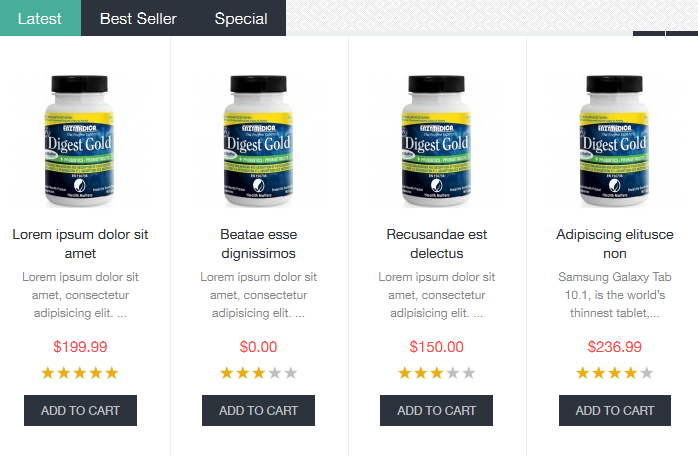
PRODUCT TABS MODULE
Product Tabs
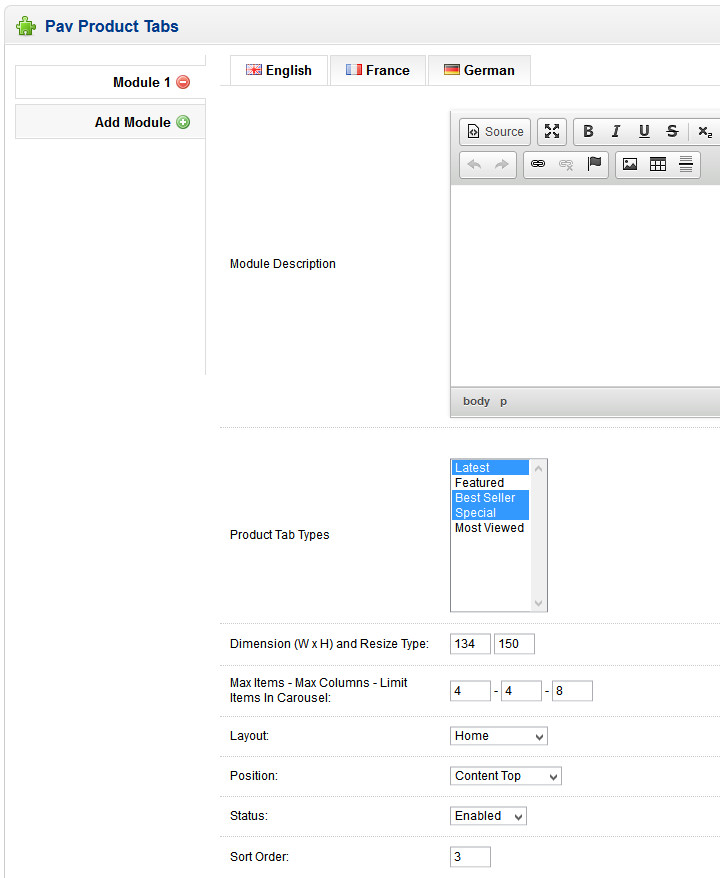
1: Preview
2: Configuration
Goto admin > Extensions > Modules
Install and edit Product Tabs
Enter in the details below to configure this area like the images above.
CUSTOM MODULE
Module custom:
1. Preview
Postion Content Top
2. Configuration
Goto admin > Extensions > Modules
Install and edit Custom Module
Enter in the details below to configure this area like the images above.
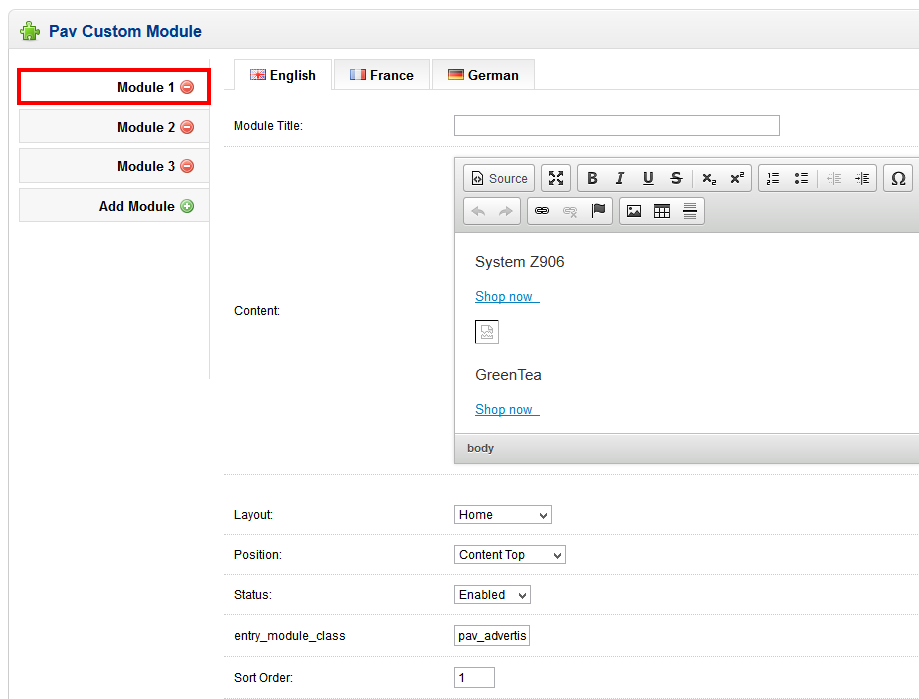
Source Code Content
<div class=”row-fluid”>
<div class=”span6″>
<article>
<div>
<h3>System <span>Z906</span></h3>
</div>
<p><a href=”#”>Shop now <span class=”icon-next”> </span> </a></p>
<img alt=”System Z906″ src=”image/data/demo/system.png” />
</article>
</div>
<div class=”span6″>
<article>
<div>
<h3>Green<span>Tea</span></h3>
</div>
<p><a href=”#”>Shop now <span class=”icon-next”> </span> </a></p>
<img alt=”Green Tea” src=”image/data/demo/tea.png” />
</article>
</div>
</div>
Position Column Right
1. Preview
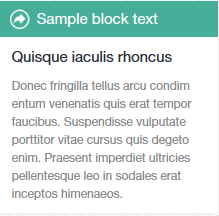
2. Configuration
Goto admin > Extensions > Modules
Install and edit Custom Module
Enter in the details below to configure this area like the images above.
Source Code Content:
<h3 class=”box-heading”><span>Sample block text</span></h3>
<h3>Quisque iaculis rhoncus</h3>
<p>Donec fringilla tellus arcu condim entum venenatis quis erat tempor faucibus. Suspendisse vulputate porttitor vitae cursus quis degeto enim. Praesent imperdiet ultricies pellentesque leo in sodales erat inceptos himenaeos.</p>
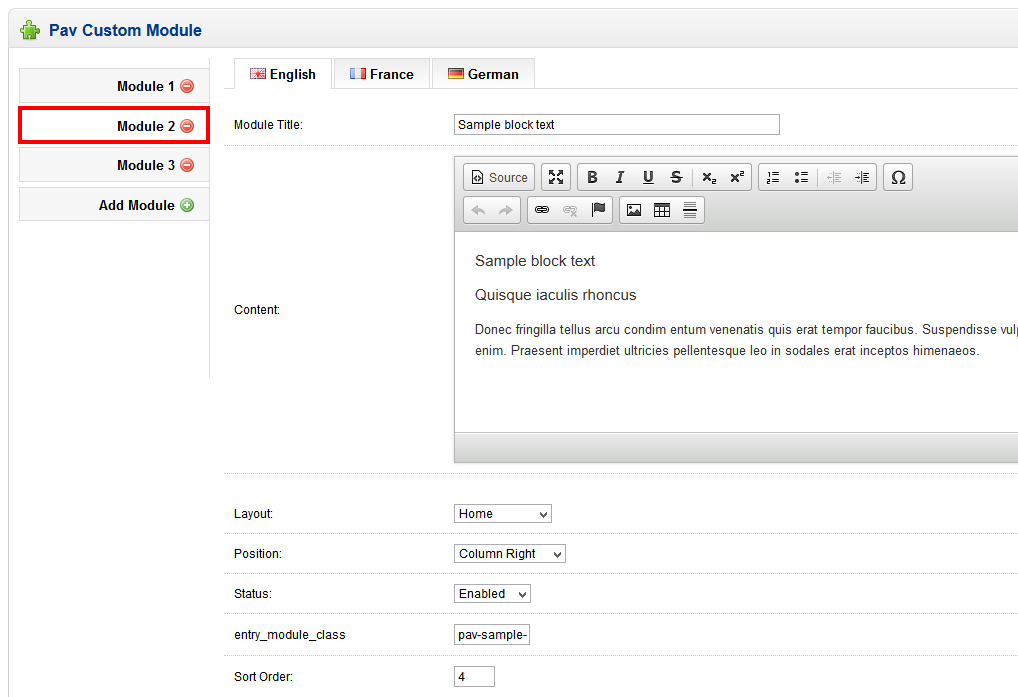
Position Footer Top
1. Preview

2. Configuration
Goto admin > Extensions > Modules
Install and edit Custom Module
Enter in the details below to configure this area like the images above.
Source Code Content:
<div class=”row-fluid”>
<article class=”span4″>
<h3>Online counseling</h3>
<img alt=”Online Counseling” src=”image/data/demo/online.png” />
<p>Lorem ipsum dolor consectetur adipscing elit phasellus lacus ac mauris ante acumsan turpis non magna nibh urna.</p>
</article>
<article class=”span4″>
<h3>Free shipping</h3>
<img alt=”Free Shipping” src=”image/data/demo/free-shipping.png” />
<p>Lorem ipsum dolor consectetur adipscing elit phasellus lacus ac mauris ante acumsan turpis non magna nibh urna.</p>
</article>
<article class=”span4″>
<h3>Connect to Us</h3>
<p>Lorem ipsum dolor consectetur lacus ac urna.</p>
<ul class=”clearfix”>
<li><a class=”icon-facebook” href=”https://facebook.com/” target=”_blank” title=”Facebook”>Facebook</a></li>
<li><a class=”icon-twitter” href=”https://twitter.com/” target=”_blank” title=”Twitter”>Twitter</a></li>
<li><a class=”icon-youtube” href=”https://youtube.com/” target=”_blank” title=”Youtube”>Youtube</a></li>
<li><a class=”icon-google” href=”https://plus.google.com/” target=”_blank” title=”Google Plus”>Google Plus</a></li>
<li><a class=”icon-linkedin” href=”http://www.linkedin.com/” target=”_blank” title=”Linkedin”>Linkedin</a></li>
</ul>
</article>
</div>
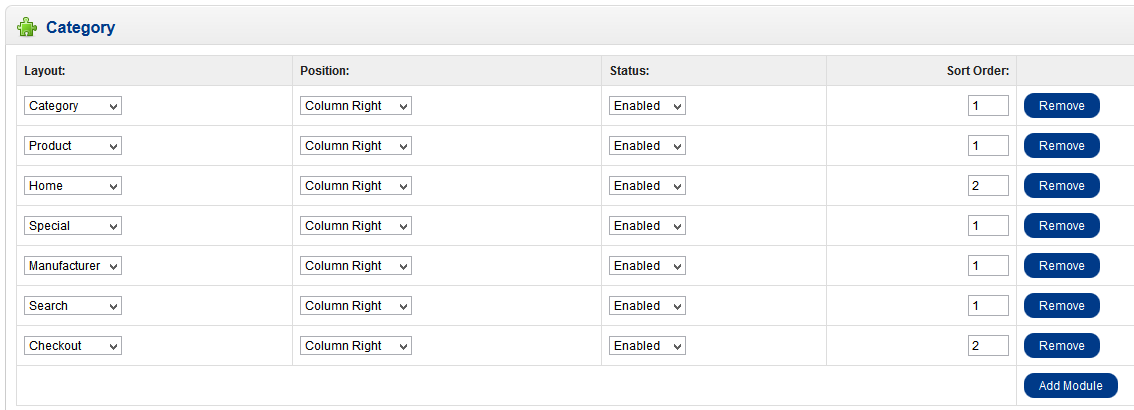
CATEGORY MODULE
Position Column Right
1. Preview
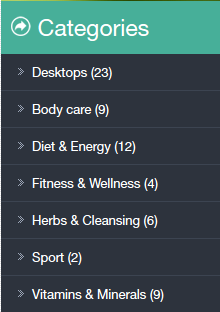
2. Configuration
Install and edit Category Module
Enter in the details below to configure this area like the images above.
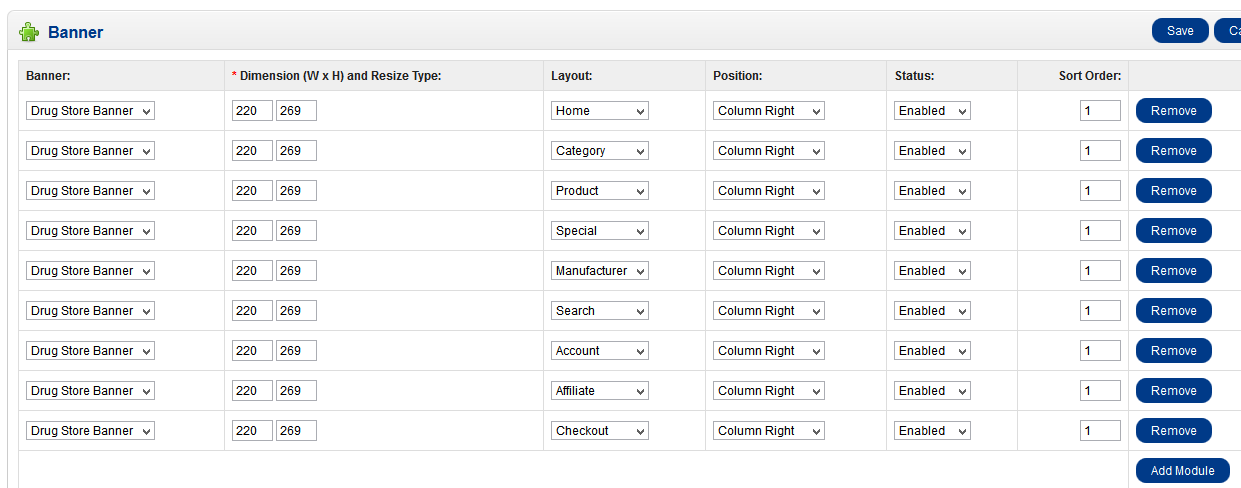
BANNER MODULE
Position Column Right
1. preview
2. Configuration
Install and edit Banner Module
Enter in the details below to configure this area like the images above.
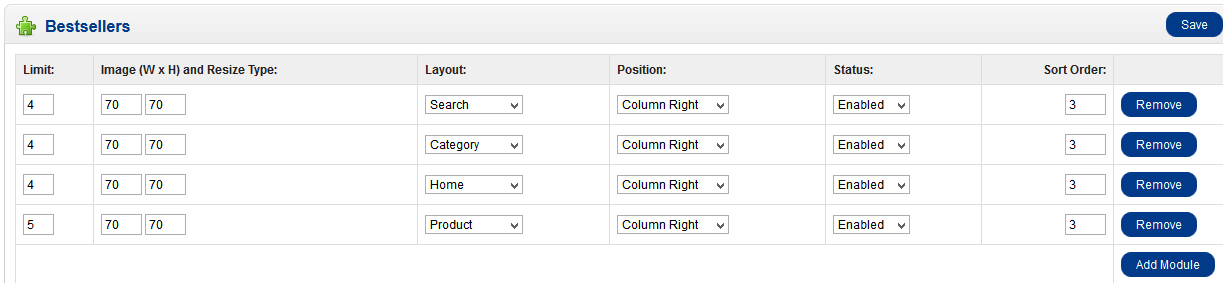
BESTSELLERS MODULE
Position Column Right
1. preview
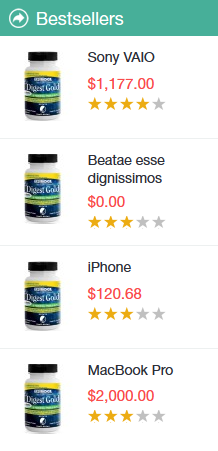
2. Configuration
Goto admin > Extensions > Modules
Install and edit Bestsellers Module
Enter in the details below to configure this area like the images above.
FEATURED MODULE
Position Content Bottom
1. preview
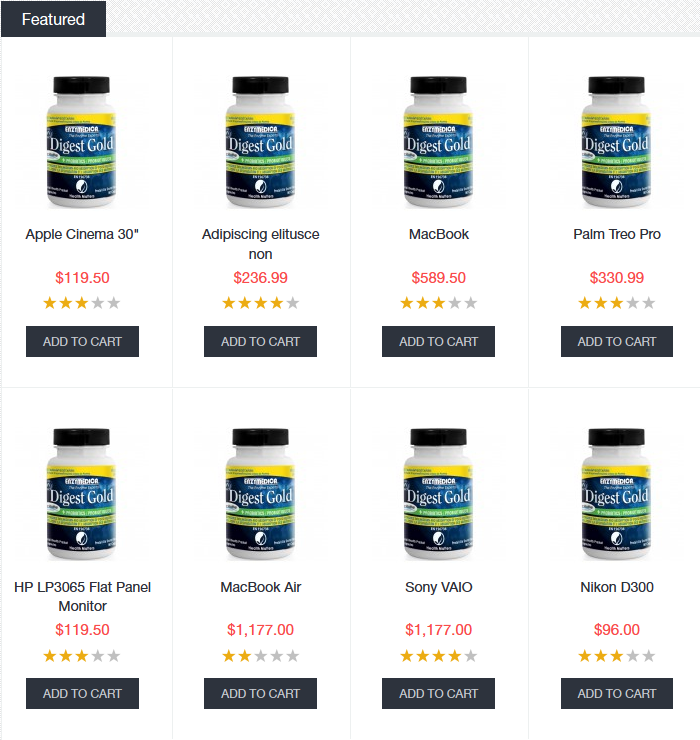
2. Configuration
Goto admin > Extensions > Modules
install and edit Featured Module
Enter in the details below to configure this area like the images above.

Click here to view more details about the Featured Module
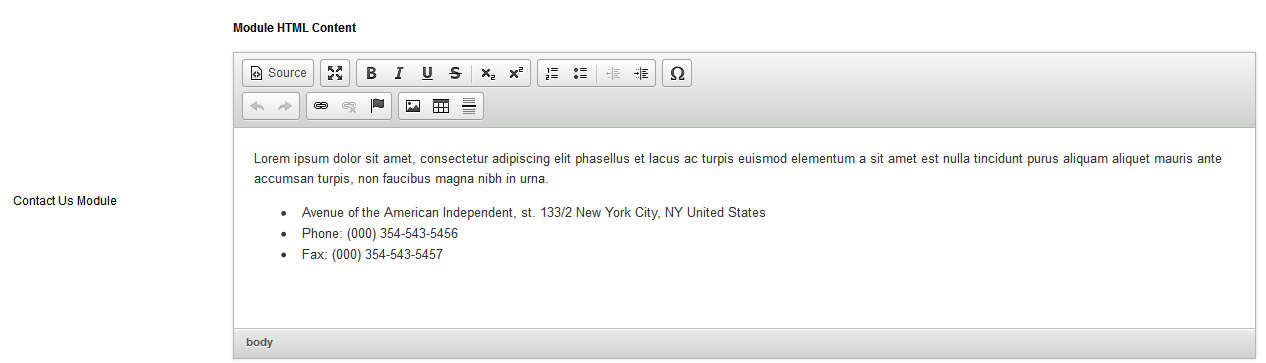
CONTACT US MODULE
Position Footer Center
1. Preview
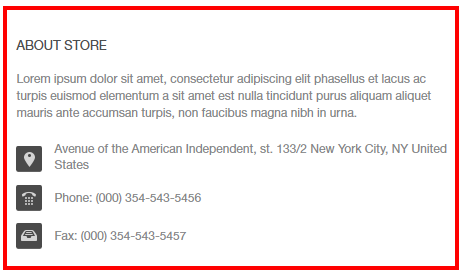
2. Configuration
Goto admin > Extensions > Modules > Theme Control Panel
In Tab Internal Modules
Enter in the details below to configure this area like the images above.
Home Page Manufacture Images
The home page manufacturer images can be modified in the Banners Area
The manufacture images are being displayed by using the Carousel Module
Add News / A Blog / Articles
You can add news to your site via the Blog Manager
Leave A Comment?