Video Instructions
The Customers page lets you insert / edit customers
To get to this area click Sales > Customers

The Filter Bar
The top row of the customer screen is a ‘Filter’ area This is an easy way to see specific customers

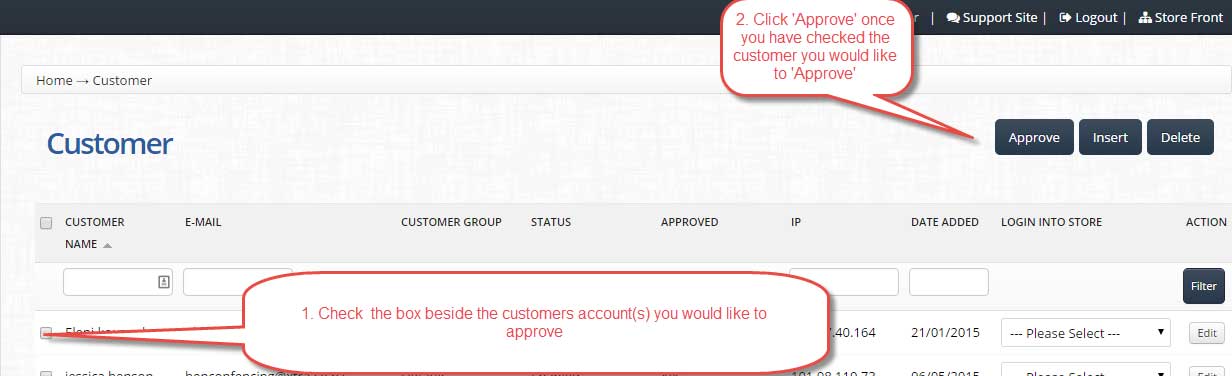
Manually approving a customer
To manually approve a customer you need to go to:
- Tick the checkbox beside the customer you would like to approve
- Click the ‘Approve’ button
Editing a customer
To edit a customer click the edit button beside the customer you wish to edit
This takes you to the Customer editing area (as detailed below)

Adding a Customer
To add a new customer click the ‘Insert’ button
This takes you to the Customer editing area (as detailed below)

Customer Area
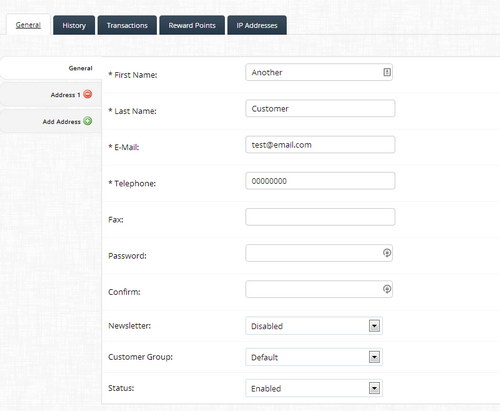
General Tab
The general tab asks for the customer’s basic information: “First Name”, “Last Name”, “E-Mail”, and “Telephone”. A password must be submitted for the customer to access the site privately. Under “Confirm”, retype the password. Enabling “Newsletter” will put this customer on the e-mail newsletter list. Later on, you can categorize this customer into a specific customer group. The customer will be categorized into “Default” if there isn’t a defined customer group available. The status determines whether or not this customer will be allowed to access the store’s login.
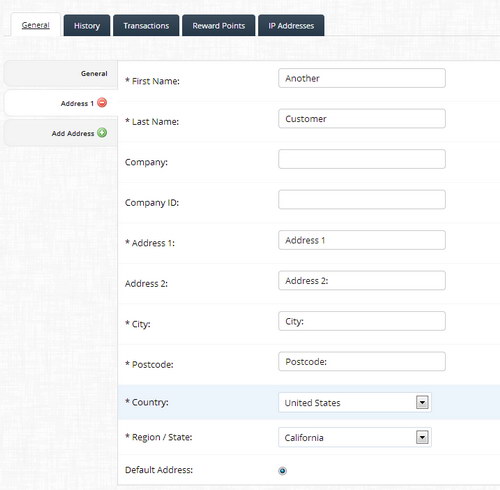
General > Address
Clicking the Green ‘+’ button will add the “Address 1” address form.
You may add as many addresses as needed with the green button, or remove them with the red ‘-‘ button.
The “First Name”, “Last Name”, “Address 1”, “City”, “Country”, and “Region/State” are required fields in the address form.
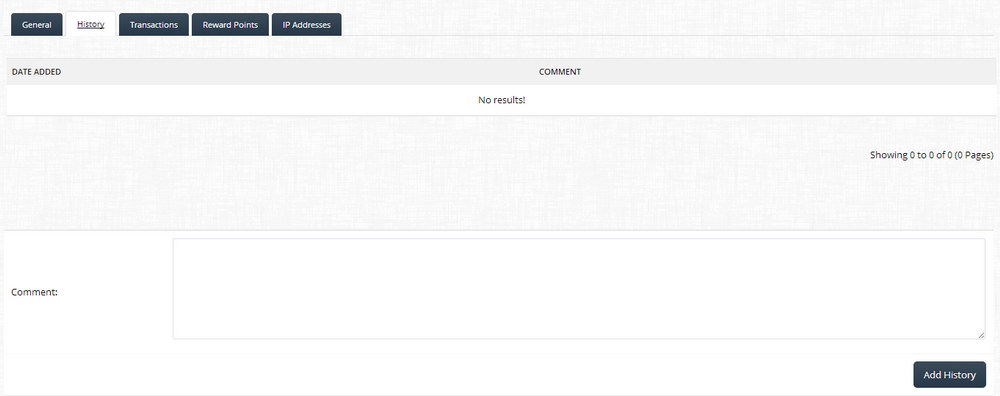
History Tab
This area shows you the customers previous comments
Transactions Tab
Here you can see past order
![]()
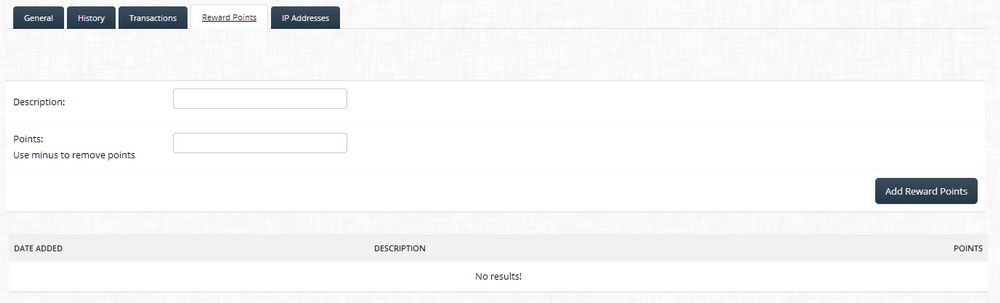
Reward Points Tab
This area shows you the current reward points balance and also lets you add reward points
IP Addresses
This lets you see the customers ip address and if needed you can ban it

Remember to click ‘Save’ when you have completed this area
Leave A Comment?