Video Instructions
Using Categories

In this area you can add / delete / modify the categories on your site
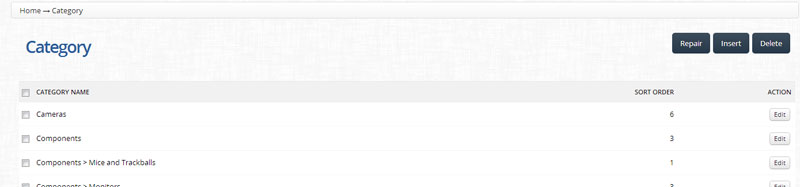
Products > Category.
Make sure to click the Insert button.
You can find it in the upper-right corner of the screen. It is close to the Delete button.
Catalog>>>Category.
Make sure to click the Edit button.
You can find it in the left hand side of the screen in line with the category name you want to edit
You will see in this area 3 different category tabs available – to select one just click on the tab name
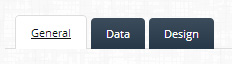
After clicking on the Insert / Edit button, you will be redirected to the following screen.
In order to create a Category, you only need to enter in the category name – however there are a few extra fields available for advanced customization
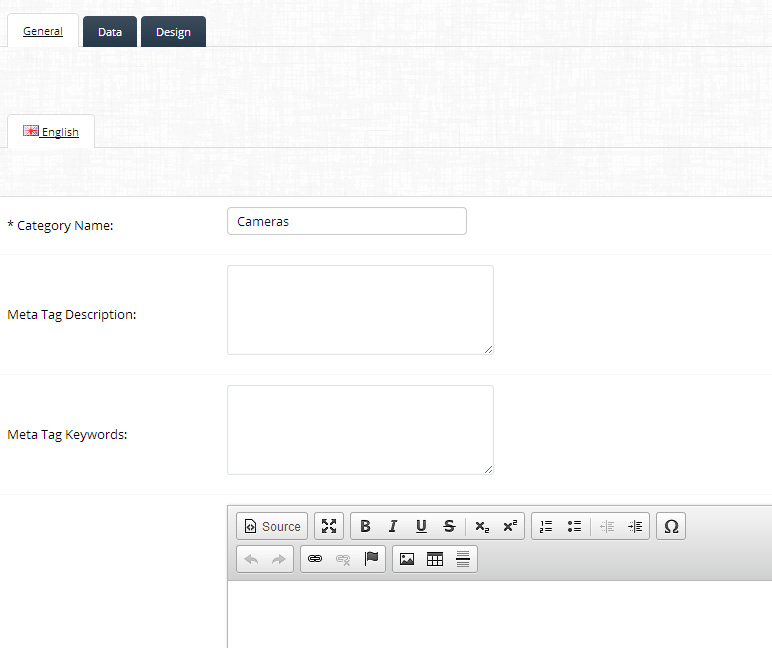
The Category Name must be filled with the exact terms that define that category. Ex. If the online store is selling clothes, possible categories can be the following: “T-Shirts”, “Shirts” or “Jeans”. This is the text that is displayed on your site.
The Meta Tag Keywords section lets you enter in relevant keywords for this product. Great for SEO but make sure the keywords you use are relevant.
Seperate multiple keywords by a space and comma
eg
design, sites, websites etc etc
name of category
goods under the category
general way people use the items in the category
any other important aspect regarding the category
The Meta Tag Description field lets you enter in a relevant description for this category. Great for SEO but make sure it is relevant.
Try to create a “flowing” and descriptive text (that is not too long)
eg
Amazing website design for a fraction of the price
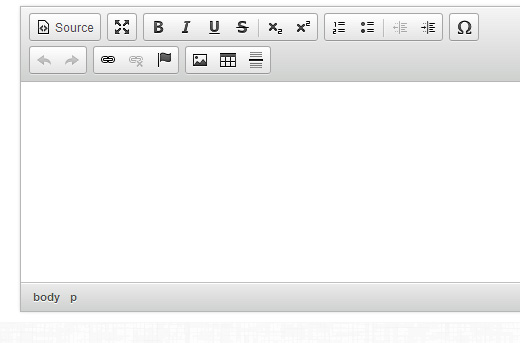
The Description area is made from an HTML Rich Text Editor. This is also a WYSIWYG editor. You can either enter in the text you want displayed (just like you do in word / email applications) or you can insert HTML code using the Source button. The HTML Rich Text Editor helps to write bold, italic or underlined text.
Full details can be viewed on the Formatting Page
Clicking on the Data Tab will reveal a few more advanced options that you can fill in:
Parent Category, Filters, Stores, SEO Keyword, Image, Top, Columns, Sort Order and Status.
Adding Sub Categories (Parent Category):
In this area you can enter in a parent category
(ie you just made a top level catgory called ‘Tops’ and this one is called Long Sleeve Tees
To do this start typing in the first few letters of the filter you have already created

Filters:
To do this start typing in the first few letters of the filter you have already created

Stores:
It is recommended to leave the Stores option as it is, making sure that the “Default” option is selected.
The SEO Keyword – PLEASE LEAVE THIS BLANK as it will be auto gennerated from the products list area by clicking Generate SEO Keywords
If you would like to change this you can add certain keywords that will help the category to be better seen by search engines, such as Google.
SEO is the acronym for Search Engine Optimization. Try to add the best word or words that describe the category.

This lets you display this category in the top navigational menu
This only works for the top parent categories and only in some themes
Columns:
PLEASE LEAVE THIS AS THE DEFAULT
Sort Order:
Sort Order helps the platform to add priorities to each category. The lower the number on the Sort Order, the hire the category is displayed

Category Status:
The Category Status can be either Enabled or Disabled. In order to have a visible category, the user will need to be sure to select Enabled.

The Design Tab:
Stores
Select a layout override to change the look and feel of this category.
How to add image to Category / Product
How to add an image to Category / Product / Page
When adding and image you use the Image Manager application.
To open this you need to click on the image you want to change. If there are no previously selected images there will be a default box that you need to click

This opens the Image Manager
The image folder is the base folder. From here you can view the current folders available or add a New Folder. There are also a few other tools that are useful, including Move, Delete, Copy and Rename. You can Upload new pictures and even Refresh the folders to see and what images they contain.
To use an image simply double click the desired image, this will load it to your page.
NOTE: Make sure you do not try to upload large digital images as the system will not work! You will need to resize these images to a max of 800 pixels (width / height) a great free software application you can use is available at:
Their help area explains how to resize images
http://www.irfanview.com/faq.htm#Q3

If you have added images to folders you will need to expand the image folder view.
In the Image manager area
click the + beside the image folder (left hand pane)
this will show you the other folders you have created
click on the desired folder then click on the image you want to use / add

Leave A Comment?